Homemade Star Crunch Cookies – Nostalgic Chocolate Caramel Treat
Homemade Star Crunch Cookies are a nostalgic trip down memory lane, bringing a beloved childhood treat right into your own kitchen. Remember those iconic, star-shaped cookies with their satisfying crunch and sweet, chocolatey coating? They were the ultimate lunchbox surprise, the perfect after-school snack, and a guaranteed crowd-pleaser at any party. What makes these homemade star crunch cookies so incredibly special is their ability to perfectly replicate that irresistible texture and flavor we all adore. The crispy, slightly chewy cookie base, infused with a hint of vanilla, provides the perfect canvas for a rich, smooth chocolate drizzle that hardens into that signature shell. Forget store-bought; making your own star crunch cookies allows you to control the quality of ingredients and, most importantly, share the joy of this classic confection with your loved ones. Get ready to bake up a batch of pure happiness!
Star Crunch Cookies: A Nostalgic Delight
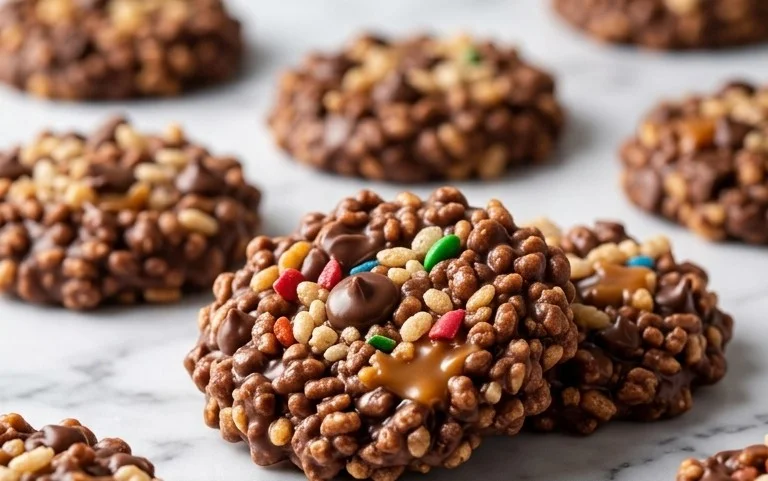
Remember those crunchy, caramelly, chocolatey snacks that seemed to be a staple of childhood lunchboxes? Yes, I’m talking about Star Crunch cookies! While the store-bought versions are convenient, there’s something incredibly satisfying about recreating that iconic treat in your own kitchen. These homemade Star Crunch cookies capture the essence of the original, with a delightful balance of sweet caramel, rich chocolate, and that signature crispy texture. Get ready to unleash your inner child and bake up a batch of pure nostalgia.
This recipe is surprisingly simple and requires no fancy equipment. It’s a fantastic activity to do with kids, as they can help with the mixing and shaping. The result is a batch of cookies that are perfect for a quick snack, a lunchbox surprise, or even a fun addition to a party dessert table. Let’s dive into the ingredients and get baking!
Ingredients:
- ¼ cup semi-sweet chocolate chips
- ½ cup salted caramel chips (Hershey brand (see notes section below if using a different brand))
- 2 tablespoons butter (unsalted or salted work, just not margarine)
- 2 cups mini marshmallows
- 2 cups Rice Krispies cereal
Notes on Ingredients:
The type of caramel chips you use can make a slight difference. Hershey’s brand salted caramel chips are specifically designed to melt beautifully and provide that distinct caramel flavor. If you are using a different brand, be aware that some caramel chips might be more prone to seizing or not melting as smoothly. In such cases, you might need to adjust the melting process slightly. For the butter, feel free to use either salted or unsalted. If you use salted butter, you might find the final cookies have a slightly more pronounced salty-caramel flavor, which many people enjoy. Just be sure to avoid margarine, as it contains more water and can affect the texture of your cookies.
Cooking Instructions:
Melting the Base:
1. Begin by preparing a safe surface for your finished cookies. Line a baking sheet or a large platter with parchment paper or wax paper. This will prevent the cookies from sticking and make cleanup a breeze. Set this aside.
2. In a medium-sized, microwave-safe bowl, combine the ¼ cup of semi-sweet chocolate chips and the ½ cup of salted caramel chips. Add the 2 tablespoons of butter to the bowl. These are the foundation of our cookie’s flavor and gooey texture.
3. Place the bowl in the microwave. Heat on medium power (or 50% power) in 30-second intervals, stirring thoroughly after each interval. This gradual melting process is crucial to prevent the chocolate and caramel from burning or seizing. You want a smooth, glossy mixture. It might take a few rounds of heating and stirring, but be patient. Once the chips and butter are mostly melted, continue stirring until the residual heat melts any remaining bits and the mixture is completely smooth and homogenous. Do not over-microwave. If you prefer, you can also melt this mixture in a double boiler over low heat on the stovetop, stirring constantly until smooth.
Incorporating Marshmallows and Cereal:
4. Once your chocolate-caramel mixture is perfectly melted and smooth, it’s time to add the marshmallows. Add the 2 cups of mini marshmallows directly into the warm chocolate-caramel mixture. The residual heat from the melted chips will begin to soften and melt the marshmallows. Stir gently and continuously until the marshmallows are mostly melted and have created a gooey, sticky mass that coats the chocolate and caramel. This step is where the magic happens, creating that signature sticky sweetness.
5. Now, it’s time for the star of the show: the Rice Krispies cereal! Gradually add the 2 cups of Rice Krispies cereal to the melted marshmallow-chocolate-caramel mixture. Using a sturdy spatula, gently fold the cereal into the mixture. You want to ensure that every single piece of cereal is coated with the delicious goo. Be careful not to crush the cereal too much; we want to maintain that satisfying crunch. It might seem like a lot of cereal, but keep folding until it’s all incorporated. The mixture will become quite thick and sticky at this point.
Shaping and Setting:
6. Working quickly, as the mixture will start to set as it cools, drop spoonfuls of the mixture onto your prepared parchment-lined baking sheet. You can use a tablespoon or a small cookie scoop for this. Aim for cookie-sized portions, about 1.5 to 2 inches in diameter. You can gently press them down slightly with the back of your spoon to create a flatter cookie shape, or leave them as more rounded mounds. If the mixture becomes too sticky or difficult to handle, you can lightly grease your hands with a little cooking spray or butter.
7. Allow the Star Crunch cookies to set at room temperature for at least 30 minutes, or until they are firm to the touch. For a faster setting time, you can place the baking sheet in the refrigerator for about 15-20 minutes. Resist the urge to try them too early, as they will be quite soft and may fall apart. Once they are set, they should have a delightful chewiness with a satisfying crunch.
Enjoy your homemade Star Crunch cookies! They are best enjoyed fresh, but can be stored in an airtight container at room temperature for up to 3 days.
Conclusion:
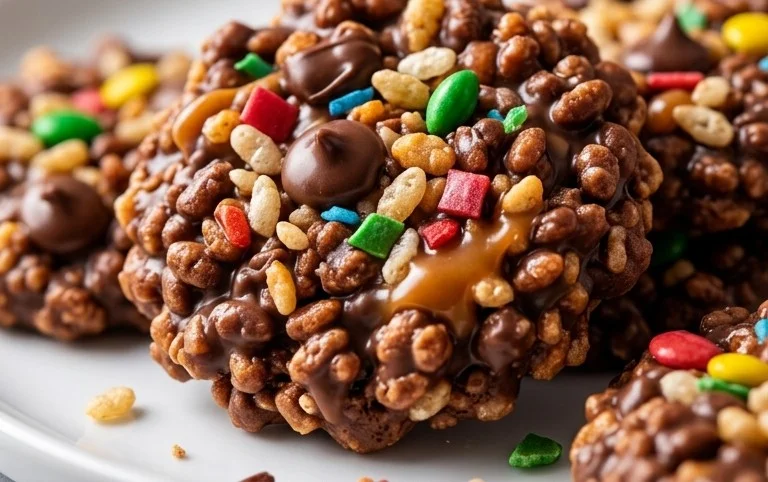
And there you have it – the simple yet sensational Homemade Star Crunch Cookies! I truly hope you’ve enjoyed learning how to recreate that beloved galactic treat in your own kitchen. These cookies are fantastic because they capture that signature chewy texture and sweet, airy crunch without any fuss. They’re incredibly satisfying to make and even more so to devour. Imagine the joy on your family’s faces as they bite into these homemade delights! They’re perfect for a midday snack, a fun addition to a lunchbox, or even as a unique dessert for your next gathering. You can serve them just as they are, or get creative! Consider dipping them in melted chocolate for an extra decadent touch, or perhaps sprinkling them with edible glitter for a truly celestial sparkle. For a flavor twist, try adding a pinch of cinnamon to the cookie dough or even a swirl of caramel. Don’t be shy – experiment and make these Homemade Star Crunch Cookies your own!
Frequently Asked Questions:
How do I store my Homemade Star Crunch Cookies?
For the best texture, store your Homemade Star Crunch Cookies in an airtight container at room temperature for up to 3-4 days. This will help maintain their chewy interior and prevent the crunchy topping from becoming too soft.
Can I make the cookie dough ahead of time?
Absolutely! You can prepare the cookie dough and refrigerate it for up to 2 days before baking. This makes it super convenient if you’re planning a cookie baking session. Just let it sit at room temperature for about 15-20 minutes before scooping and baking.
My crunchy topping isn’t sticking well. What should I do?
A common reason for the topping not sticking is that the cookies weren’t slightly underbaked when the topping was added, or the topping mixture wasn’t the right consistency. Ensure you’re adding the crunchy mixture to the cookies when they are still warm but not completely set, and press gently. You can also try lightly brushing the tops of the cookies with a little melted butter or a thin layer of corn syrup before adding the topping to help it adhere better.
Homemade Star Crunch Cookies
Recreate the classic Star Crunch cookie at home with this simple recipe, featuring chocolate, caramel, marshmallows, and crispy rice cereal.
Ingredients
-
¼ cup semi-sweet chocolate chips
-
½ cup salted caramel chips
-
2 tablespoons butter
-
2 cups mini marshmallows
-
2 cups rice krispy cereal
Instructions
-
Step 1
Melt the butter in a large saucepan over low heat. -
Step 2
Add the mini marshmallows to the melted butter and stir until completely melted and smooth. -
Step 3
Remove the saucepan from the heat and stir in the rice krispy cereal until evenly coated. -
Step 4
Gently fold in the semi-sweet chocolate chips and salted caramel chips. -
Step 5
Drop spoonfuls of the mixture onto parchment paper-lined baking sheets to form cookie shapes. -
Step 6
Allow the cookies to cool and set completely before enjoying.
Important Information
Nutrition Facts (Per Serving)
It is important to consider this information as approximate and not to use it as definitive health advice.
Allergy Information
Please check ingredients for potential allergens and consult a health professional if in doubt.