Crisp Refrigerator Dill Pickles – Easy Homemade Recipe
Refrigerator Dill Pickles are a summertime staple, and for good reason! There’s nothing quite like that satisfying crunch and bright, tangy flavor to cut through a rich sandwich or accompany a backyard barbecue. Forget the store-bought versions that often fall flat; making your own refrigerator dill pickles is surprisingly simple and incredibly rewarding. What makes these pickles so special is their quick turnaround and incredible freshness. Unlike traditional fermented pickles, these are ready to enjoy in just a few days, infusing your kitchen with that irresistible aroma of dill and garlic. The beauty of homemade refrigerator dill pickles lies in their simplicity – just a few key ingredients transform humble cucumbers into a delicious, craveable condiment. I’ve been making these for years, and they never disappoint.
Why You’ll Love This Recipe:
Simple Ingredients, Big Flavor
Ready in Just a Few Days
The Perfect Crunchy Condiment
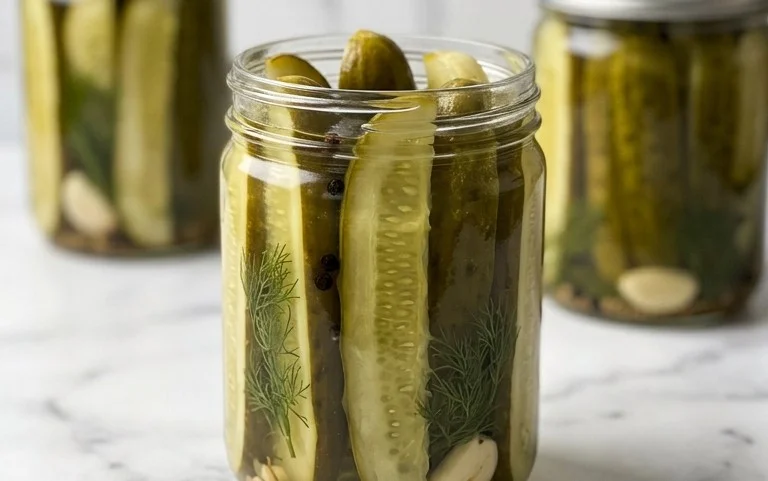
Refrigerator Dill Pickles
There’s something incredibly satisfying about a crunchy, tangy dill pickle that you’ve made yourself. Forget those sad, mushy spears from the grocery store; these refrigerator dill pickles are the real deal. They’re wonderfully crisp, bursting with fresh dill flavor, and surprisingly simple to whip up. The best part? No canning required! These pickles are designed to be stored in your refrigerator, making them an accessible treat year-round. They’re perfect for sandwiches, burgers, or just snacking straight from the jar. Let’s get pickling!
Ingredients:
- 3 cups water
- 3/4 cup white vinegar
- 3 tablespoons granulated sugar
- 2 tablespoons kosher salt
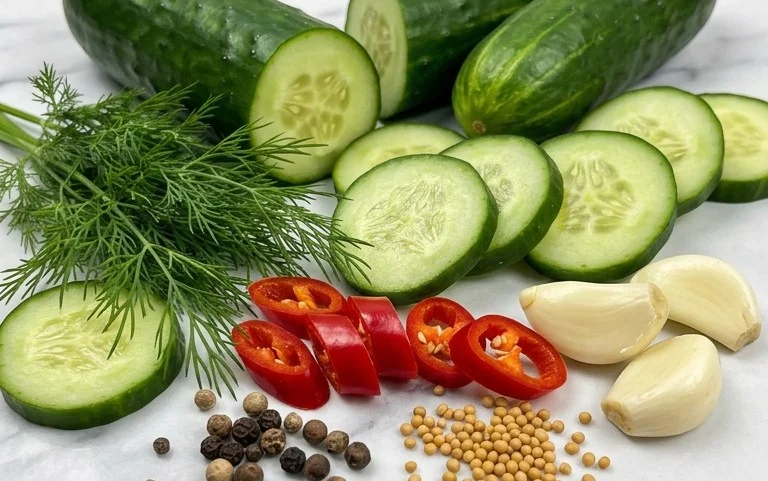
- 6 small cucumbers (about 2-3 inches long, often labeled as Kirby or pickling cucumbers)
- 8 sprigs fresh dill
- 4 cloves garlic (peeled and sliced thin)
- 2 tablespoons pickling spice
Preparing Your Cucumbers and Jars
Before we dive into making the brine, it’s important to get our cucumbers and jars ready. For the best results, choose firm, unwaxed cucumbers. If you can’t find specifically labeled pickling cucumbers, smaller, firm cucumbers will work just fine. Give them a good scrub under cool running water to remove any dirt. You can leave them whole if they are small enough to fit comfortably in your jar, or you can slice them into spears or rounds. Slicing them into rounds will give you quick, bite-sized pickles, while spears offer a more traditional pickle experience. For this recipe, I prefer to slice my cucumbers into about 1/4-inch thick rounds for speedy pickling and easy snacking.
Cleanliness is key for any preserving project, even for refrigerator pickles. Make sure your jars and lids are thoroughly washed and dried. I like to use mason jars, and while you don’t need to sterilize them for refrigerator pickles since they won’t be canned, a good wash with hot, soapy water is essential to prevent any unwanted bacteria. I usually use two pint-sized jars for this recipe, which holds about 6 small cucumbers sliced.
Crafting the Perfect Brine
The heart of any good pickle is the brine. This is where all the magic happens, infusing our cucumbers with that delightful tangy, salty, and subtly sweet flavor. The ratio of vinegar to water is crucial for both taste and preservation. White vinegar provides that sharp acidity that pickles are known for, while the sugar balances it out, preventing the pickles from being overwhelmingly sour. Kosher salt is preferred for pickling because it dissolves well and doesn’t contain anti-caking agents that can make your brine cloudy.
1. **Combine Brine Ingredients:** In a medium saucepan, combine the 3 cups of water, 3/4 cup of white vinegar, 3 tablespoons of granulated sugar, and 2 tablespoons of kosher salt.
2. **Heat and Dissolve:** Place the saucepan over medium heat. Stir the mixture continuously until the sugar and salt are completely dissolved. You don’t need to bring it to a rolling boil; just heat it enough to ensure everything is incorporated. Once dissolved, remove the saucepan from the heat. This simple brine is the foundation for our delicious pickles.
Assembling and Packing the Jars
Now comes the fun part: assembling the pickles! This is where we layer in the aromatics and give our pickles their signature dill flavor.
3. **Layer Aromatics in Jars:** Take your clean jars and begin by placing half of the fresh dill sprigs into the bottom of each jar. Then, distribute the sliced garlic cloves evenly between the two jars. Next, add half of the pickling spice to each jar. These ingredients will infuse the brine as it cools and the pickles pickle, creating layers of flavor.
4. **Pack the Cucumbers:** Tightly pack your prepared cucumber slices into the jars, on top of the dill, garlic, and spices. Try to fit as many as you can without crushing them. If you’re making spears, arrange them vertically in the jar. The tighter you pack them, the more pickles you’ll fit, and the more flavorful they’ll become.
The Pickling Process
With everything assembled, it’s time to pour the brine and let the magic happen in the refrigerator.
5. **Pour Brine and Seal:** Carefully pour the warm (not boiling hot, but warm from heating) brine over the cucumbers in each jar, making sure to cover them completely. Leave about 1/2 inch of headspace at the top of the jar. If you find you don’t have quite enough brine to cover, you can quickly whip up a little more using the same ratio of water, vinegar, sugar, and salt. Once the jars are filled and the cucumbers are submerged, screw on the lids tightly.
6. **Refrigerate and Let Pickle:** Allow the jars to cool down to room temperature on your counter for about an hour or two. This is an important step to prevent thermal shock to the glass jars. Once they’ve reached room temperature, place them in your refrigerator.
Enjoying Your Homemade Pickles
The waiting game is the hardest part, but it’s worth it! Your refrigerator dill pickles will be ready to eat after at least 24 hours, but they truly shine after 48 to 72 hours. The longer they sit in the refrigerator, the more the flavors will meld and the crunchier they will become. These pickles will stay fresh in the refrigerator for about 2-3 weeks. Give them a shake every now and then to redistribute the spices. Enjoy the satisfying crunch and bright, fresh dill flavor of your very own homemade refrigerator dill pickles! They’re a testament to simple ingredients and a little bit of patience.
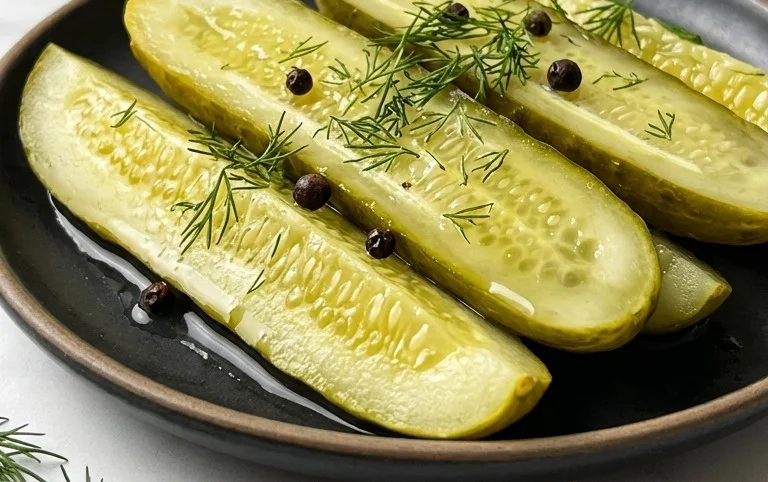
Conclusion:
And there you have it – a simple, foolproof method for making delicious Refrigerator Dill Pickles right in your own kitchen! What makes this recipe so fantastic is its speed and simplicity. Unlike traditional canning, these pickles require no special equipment or lengthy processing. You get that satisfying crunch and tangy dill flavor in a matter of days, not weeks. They’re incredibly versatile, perfect for elevating burgers, sandwiches, and charcuterie boards, or simply enjoying as a healthy, low-calorie snack straight from the jar.
Don’t be afraid to experiment! You can easily adjust the spice level by adding extra chili flakes, or introduce other flavors like mustard seeds, peppercorns, or a hint of garlic. Feel free to try different types of cucumbers too; kirby or Persian cucumbers work wonderfully. I truly encourage you to give these Refrigerator Dill Pickles a try. The satisfaction of biting into a perfectly brined pickle you made yourself is unparalleled. Happy pickling!
Frequently Asked Questions:
Q: How long do these refrigerator dill pickles last?
A: Stored properly in the refrigerator, these pickles will typically stay fresh and delicious for about 3 to 4 weeks. Always ensure the jar is well-sealed.
Q: Can I use regular pickling salt instead of kosher salt?
A: Yes, you can use regular pickling salt. Just be mindful of the amount, as pickling salt is finer than kosher salt. A general rule of thumb is to use about half the amount of pickling salt compared to kosher salt if the recipe calls for kosher salt.
Q: My pickles aren’t very crunchy. What could I have done wrong?
A: Several factors can affect crunchiness. Ensure you’re using fresh, firm cucumbers and haven’t over-processed them. Some people find adding a grape leaf or a slice of horseradish root to the jar can help maintain crispness.
Refrigerator Dill Pickles
Quick and easy refrigerator dill pickles that are crisp and flavorful. Perfect for sandwiches, burgers, or as a snack.
Ingredients
-
3 cups water
-
3/4 cup white vinegar
-
3 tablespoons granulated sugar
-
2 tablespoons kosher salt
-
6 small cucumbers, sliced
-
8 sprigs fresh dill
-
4 cloves garlic, peeled and sliced thin
-
2 tablespoons pickling spice
Instructions
-
Step 1
In a medium saucepan, combine water, white vinegar, granulated sugar, and kosher salt. Bring to a boil, stirring until sugar and salt are dissolved. Let cool slightly. -
Step 2
Prepare your jars. Wash and rinse them thoroughly. For refrigerator pickles, sterilization is not strictly necessary, but clean jars are essential. -
Step 3
Place dill sprigs and sliced garlic at the bottom of your clean jars. -
Step 4
Pack the sliced cucumbers tightly into the jars on top of the dill and garlic. -
Step 5
Pour the slightly cooled brine over the cucumbers, ensuring they are fully submerged. Add pickling spice to the jars. -
Step 6
Seal the jars tightly with lids and place them in the refrigerator. Allow pickles to pickle for at least 24 hours before serving, though flavor improves with 2-3 days.
Important Information
Nutrition Facts (Per Serving)
It is important to consider this information as approximate and not to use it as definitive health advice.
Allergy Information
Please check ingredients for potential allergens and consult a health professional if in doubt.